Monday, January 28, 2013

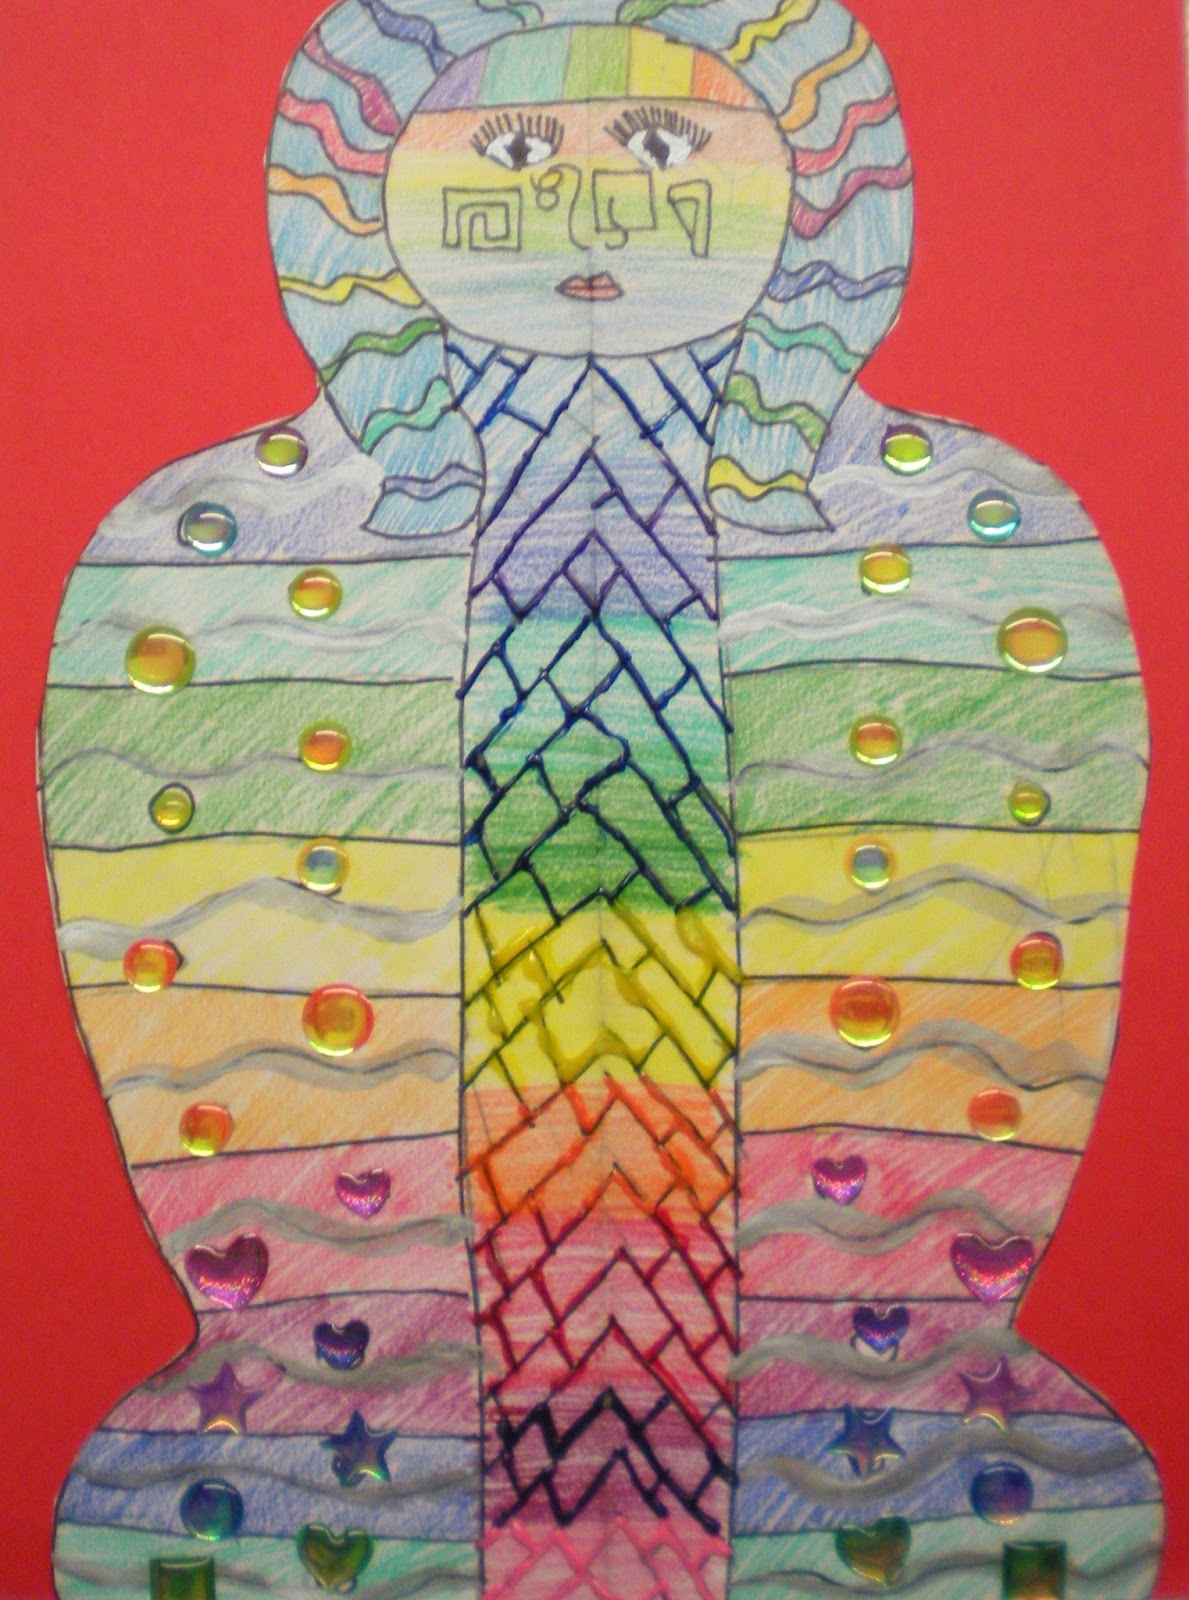
6th Grade Egyptian Sarcophagi!


In a lesson connecting to a Social Studies unit, 6th graders created sarcophagi! In Art, we studied the intricate designs, gold details, and use of hieroglyphics on the ancient sarcophagi of Egyptian royalty.


Students created their own unique symmetrical sarcophagus using various color pencil techniques, 'royal' paint (gold, silver, & bronze), and gem sticker details. Students also added their own hieroglyphics to their sarcophagus!


Students did such a fantastic job on this project! Great job 6th grade!

Friday, January 25, 2013

3rd Grade Modern Silhouettes

Can you guess which third graders these are?


This quarter, 3rd graders created beautiful silhouettes with a modern twist! Students filled their silhouettes with meaningful images that reflected their interests and personalities! Students used watercolor pencils to fill their pictures with awesome bright colors! These are so fun and reflect each student wonderfully!


 Here are some close up details of the student work:


 Third grade worked so hard on this project. Even though the images were large and there was a lot of space on the silhouettes, students filled their silhouettes with images and beautiful colors! Excellent job 3rd grade!

 
Here is another project we did for fun. Using complementary colors we created a Pop Art masterpiece! It's Quack-tast-ic!


Saturday, January 12, 2013

Pre-K Picasso Inspired Collage

Pre-K students learned about Pablo Picasso and Cubism.

Picasso loved creating art using shapes. He loved to draw, paint, and create collages. A collage is an artwork made up of different materials. We used construction paper and recycled wallpaper!


In a connection to music, we studied a painting by Picasso titled The Three Musicians. This painting contains tons of shapes and colors to make up a picture of three people playing different instruments!


PreK musicians were hung in sets of three, like Picasso's artwork. Each band was made up of one clarinet, one drum, and one guitar! These were so much fun to create!

7th Grade Abstract Expressionist Sculptures

In this unit, students learned about different Abstract Expressionist artists such as Jackson Pollock and Mark Rothko. They first began painting different types of papers using abstract tools (no paintbrushes... instead they used toothbrushes, sticks, straws, sponges, etc.). Students were able to create beautiful and colorful abstract paintings!


After painting, students learned about artist Frank Stella, who creates 3D sculptural reliefs which are abstract and contain various lines, shapes, and movement. Taking their abstract paintings, students cut out various shapes and assembled them together to create their own sculptures!

These came out so colorful and fun!


Great job 7th grade!

8th Grade Name Paintings

8th graders created personalized name paintings in early October.
Learning about font creation and different painting techniques, students created these wonderful representational paintings!


Great work 8th grade!

6th Grade Recycled Folktale Masks!


6th graders had so much fun with this colorful and exciting recycling project!
Students learned about traditional masks from around the world and their purposes in different cultures. Some masks are used in ceremonies while other masks are used for fashion. Some masks even have various meanings, might represent animals, or have a special folktale behind it.

In this unit, 6th graders created their own mask using recycled materials. Their mask had to have a special meaning about it (special power, folktale, etc.) and needed to be symmetrical.

Students did such a fantastic job! The SJV 6th graders are very creative! Take a look!


These all came out so colorful and unique! Fantastic job!

Saturday, December 29, 2012

Pre-K Christmas Trees

I hope everyone had a wonderful Christmas! The new year is around the corner (as well as all of our snow)! Enjoy the rest of the vacation and I'll see you next week!

In PreK art we mixed blue and yellow to create green paint! We created our own Christmas trees, decorating them with gold metallic paint!

Here is a student example:


Be ready for new and fun art lessons in 2013!!

Saturday, December 15, 2012

Fun Stuff: Crayon Melt Art!

In need of a fun crafty art project during Christmas break? Do you have a lot of old crayons and a hair drier?   
If you do, you can create your own crayon melt art! 

As recently seen in the Miss M's art room, crayon melt art is a fun way to recycle your old crayons to create an abstract masterpiece! Here's a How To and some pictures of the art process:

Materials:
canvas (any size. you can purchase a canvas at most craft supply stores)
crayons
hot glue gun
hair drier
drop cloth (I used a garbage bag underneath my canvas to prevent crayon melt spills on the floor)

Steps:
1.) Hot glue your crayons to one end of your canvas. Make sure the tips are glued pointing down on the canvas. You can glue the crayons down in any color pattern. I chose rainbow! Also, before you start, make sure you put something down underneath your canvas. This can be a little messy!


2.) Turn on your hair drier and point it towards the middle of your crayons. It will take a few minutes for the crayons to start melting depending on how hot your hair drier can get. It's important to be patient when creating art! 


3.) After a minute or two the crayons will begin to melt. To prevent the wax from blowing off of the canvas, try pointing your hair drier downward on the crayons. This will make the airflow and the wax melt downward.


4.) Slowly glide the hair drier across the crayons so that all of the crayons melt evenly. The longer you hold your hair drier on a certain crayon, the farther the wax will drip and run down your canvas!

*Note: you can also start smelling the great smell of crayons (does anyone else love that smell?) Also, try not to touch your hair drier to the crayons... I did and the next time I blow dried my hair, it smelt like crayons!


5.) When you are finished, let the canvas and crayon drips dry. You can now hang your masterpiece up to brighten any room! *Note: crayon drips can be brittle so be gentle when touching your canvas!


:)

Tuesday, December 11, 2012

4th Grade Keith Haring Movement Figures

In 4th grade we have been learning about artist, Keith Haring. Haring was a very popular artist who created fun and colorful cartoon-like figures. His figures did not have features, but were filled with bold color and outline. His figures often looked as if they were dancing!


Students learned about Haring's life, inspirations, and legacy in the art world. In this lesson, they also learned about complementary colors! These are colors located across from each other on the color wheel. (red & green, yellow & purple, blue & orange!) Complementary colors, when put next to one another, are appear very bright!

In this project, students created their own Keith Haring figures depicting movement four times. For each figure, the student had to use a pair of complementary colors. The fourth box was a free choice and the student could use any set of colors to paint in their figure!


This project was so fun and made us want to dance!

2nd Grade Britto Inspired Still Life

In 2nd grade, students learned about the bright and colorful world of contemporary artist, Romero Britto. Britto loves to create paintings that have vivid colors, fun patterns, and thick, bold outlines.

For our project, students learned about still life paintings. Still life art is a picture of a scene that contains inanimate, or not living, objects. Still life is a famous subject for artists.

We created still life watercolor paintings of flowers in a vase inspired by Romero Britto! Here are some examples of student work:


Fabulous job 2nd grade! Your artwork came out so beautiful!

Fun Stuff: Make Your Own Watercolor Paint

Over the past few months, the marker monster has chowed down on tons of dried-up makers. He ate so many markers that he was literally full! There are so many great ways to recycle dried-up markers. One thing that you can do with your markers is create your own watercolor paint!

Materials: to make your own watercolor paint you will need dried-up markers (separated into colors), a cup of water, and pliers.
1. First, using pliers, take the plug off of the bottom of the marker.
2. Using the pliers, take the foamy marker middle out from inside of the marker.
3. Put the foamy middle into a cup.
4. Add a few marker middles (of the same color) into the cup.
5. Add water and fill the cup a little over half way.
6. Let it sit. The water will soak into the marker, while will end up changing the color of the water. The longer you let the marker middles sit in the water, the more intense the watercolor paint will be.

So far, we have created red, orange, yellow, green, blue, and purple watercolor paints! We cannot wait to use them in some of our upcoming projects!

Below are some pictures of the watercolor making process!!


Maybe we'll be using these homemade watercolors in an upcoming project!